Astro Production Deployment
This is a tutorial to deploy Astro static web app to Azure.
Setup Astro repo
Please follow the Astro Installation guide with GitHub repo enabled
Setup Domain name
You can buy any domain with cheap price from Godaddy.
Deploy your Astro repository to Production
After setting up your Astro repository on GitHub, you are ready to the repository to Production There are several ways to deploy Astro. I only mention two ways, which are Netlify and Azure.
Deploy to Netlify
Astro already has integration to deploy static web app to Netlify. Here is the deployment guide
Add custom domain name in Netlify
Netlify provides default domain name with site-name.netlify.app If you want to add your custom domain, you follow these steps.
- Go to Netlify
- Open Domain Management tab
- Click Add Custom Domain
- Enter your custom domain, click Verify
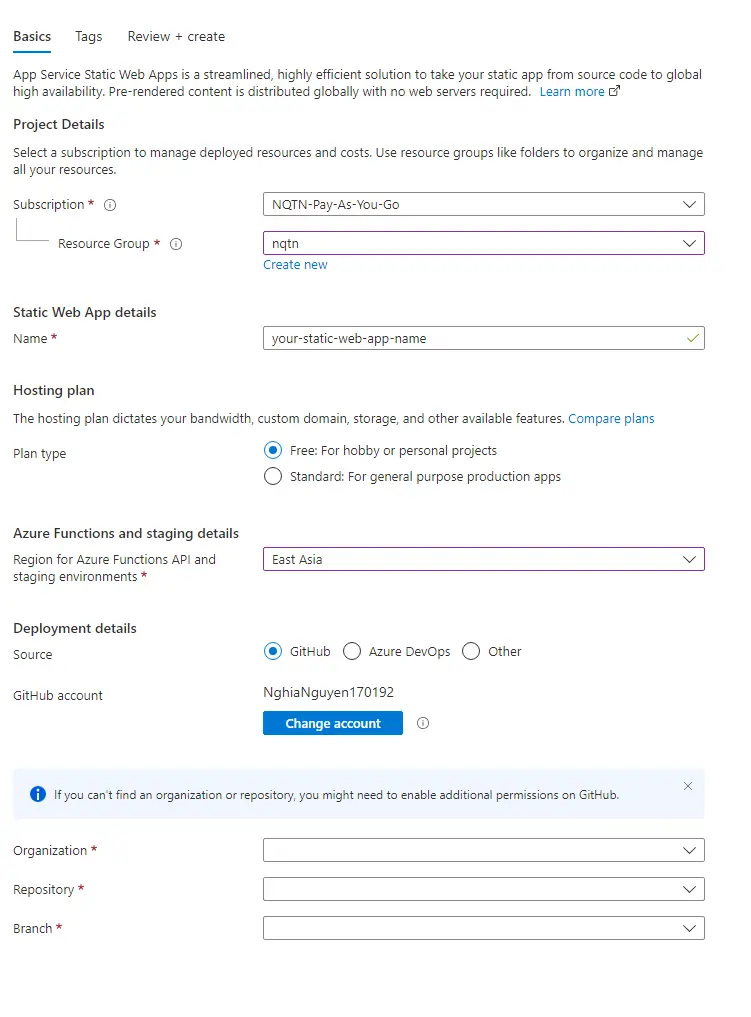
Deploy to Azure
Here are steps to deploy to Azure.
- Go to Azure Portal
- Click App Services
- Click Create
- Under Publish, choose Static Web App
- Enter Name
- Under Deployment Details, choose GitHub
- For Hosting Plan, choose Free: For hobby or personal projects
- Link your Organization , Repository and Branch
- Then click Create
It will create a deployment .yml file under .github/workflows
Then navigate to Actions in your GitHub repo. Once the workflow runs successfully, you can check your blog is published publicly to the Internet.